
Hello everyone ❤︎! Today I am going to be talking to you guys about how I clean my makeup brushes and sponges. If you follow me on instagram you know I love my brushes, and I am a huge advocate for cleaning them at least once a week. I think doing so not only helps to keep your makeup and skin bacteria free, but it can also prolong the life of your favorite products and keep your makeup application flawless!

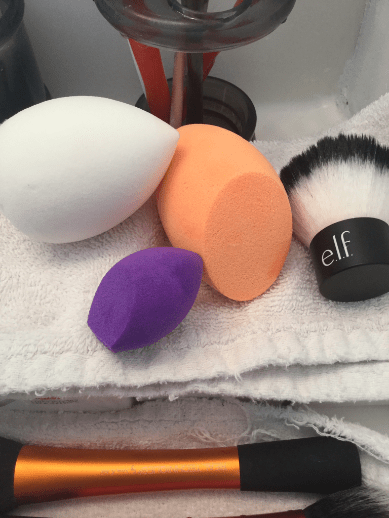
Here is everything I am going to be cleaning today. I have some sponges, my quick change brush cleaner, and brushes from Real Techniques, Morphe, Elf, Colourpop, BH Cosmetics etc. (Also, I want to credit my friend Rachel for giving me the tip on what soap to use, thanks Rachel! ❤︎)
This is going to be a kind of a step by step with some photos – but it’s really no big deal and the biggest investment you need is your time!

To clean my brushes I use a Zote laundry soap bar, which can be found at Wal-Mart for about a dollar, and a “brush egg” – I found the brush egg on amazon as an add on item for a few dollars, and I’ve also seen Pinterest posts on how to make your own using paper plates and hot glue. Basically what you’re looking for here is the ridges, because you’re going to be running your brush over them to help clean them. I will link everything I can at the bottom of the post. Anyway, here we go!
Step 1) Wet the bristles!
Step 2) Run the brush over the bar of Zote to get it nice and soapy.
Step 3) Rub the brush all over the egg, focusing larger face brushes on the longer rows of ridges, and smaller eye brushes just on the tinier pegs on top of the egg.

Really take your time with this, making small circles with the brush over the egg. The ridges are going to help pull all product and residue out of the brush more than you could just rubbing it with your fingers or on the bar itself.
Step 4) Rinse the brush until you see clean water coming from the bristles. I even like to continue running the brush over the egg while under the water until everything is perfectly clean.
The reason I like to use Zote is because it is cost efficient and very effective. Because it is detergent and not just hand soap, it really deep cleans the bristles. It can be harsh on skin so keep that in mind as you’re cleaning (your hands might be dry afterwards!). Also make sure you are REALLY rinsing your brushes well of all soapy residue or the bristles might dry funny and clump together.
Step 5) Gently pinch the bristles to squeeze excess water out.
Step 6) Lay the brushes flat down on a hand towel to dry.

This is SUPER important – you want to dry the brushes laying down and not standing up so that water doesn’t fall into the metal ferrules. This is to prevent any rust or loosening of glue and handles and things like that. Leave them to dry overnight.

Zote also works amazing on makeup sponges as well! Above is the “before” of my white Elf makeup sponge. Cleaning sponges can take a little bit more work, but is similar to brushes, except it requires a ton of squeezing!
Step 1) Wet your sponge and squeeze it a few times under water to make sure it is fully saturated.
Step 2) Get it nice and soapy, rubbing the sponge all over the bar of detergent and squeezing it a few more times to get the soap into the sponge.
Step 3) Keep squeezing under running water to rinse the soap and water until water runs clean – again this is super important because if soap stays trapped in the sponge it will affect the performance of the sponge later on when you go to use it again.
You may need to rub your thumbs over the more stubborn stains that refuse to leave (be mindful of your fingernails or you can rip the sponge), but its nothing that a few repeats of the above steps can’t fix!
Step 4) Leave the sponge to dry on a towel overnight.
And here is the after! See – perfectly white again! Just keep in mind that makeup sponges are not meant to last forever, though, and even with regular cleaning they should be replaced every 1 to 3 months.
The brushes I cleaned today all had synthetic bristles, but I have used this same method with natural hair bristles with no worries as well. I also like to just gently clean the handles of the brushes as well while I’m at it to get them looking new again!

The biggest advice I have to get your brushes really clean is to just have patience. Give every brush attention so you aren’t leaving behind cosmetic or soap residue. I am one of those people that really finds cleaning to be calming, so I like to watch a few Youtube videos or Netflix while I do this.
While washing your brushes can wear them down over time, I do think it is better to need to replace a brush than to spread bacteria ya know? Personally I have been using this method for a while, though, and have not noticed any change in quality or damage of my brushes. If anything, I think it might have made some brushes softer!
Also, if you have a lot of makeup brushes and do not use every single brush throughout the week, a good way to sort out which are clean and which are dirty is to just keep an empty cup or brush holder on your vanity/sink/wherever you keep your makeup. This way, after you use a brush, you can separate it from the clean ones so that not only do you know which to wash, but it prevents contamination of the clean brushes as well!
I personally display my brushes in all kinds of ways: old candle holders, little jars, fun cup holders, even pretty gravy boats!
(Bonus – an easy way to clean wax out of an old candle holder is to just run hot water over the wax until it softens enough to scrape out!)

Finally – make sure you clean things like your tweezers an eyelash curlers too: just rub a cotton ball with some alcohol over them.
Buy Zote From Wal-Mart and Amazon
Shop “Brush Eggs” Here
Brushes Shown From:
BH Cosmetics
Elf Cosmetics
Morphe
Colourpop
Real Techniques
Anyway, I hope this was helpful in some way! My friend Mariah asked me how to clean makeup sponges recently and it gave me the idea to make a whole post about it, thanks Mariah! Hope you guys have a great week, and happy cleaning!
-Lacie ❤︎❤︎❤︎
